Moore & Wright Ensures Affordable Measuring Precision for High-Quality Engineering
23 November 2012
Most manufacturing processes require the highest levels of measuring accuracy. Industries like automotive, mining, aerospace and general mechanical engineering simply cannot afford discrepancies in the size of engineered components.

Not only does this range of precision measuring equipment provide engineering clients with absolute accuracy, but the products are also affordable.
Specific, predetermined tolerances are required to ensure absolute conformance for both quality and safety reasons, and in many cases, high quality, precise measuring equipment can be the key to success.
“Precision measuring equipment ensures that each component produces consistent repeatability in manufactured parts,” says Andrew Poole, Director of First Cut, a leading distributor of international capital equipment and consumables. “It is critical for First Cut’s clients to be guaranteed the highest levels of quality in the products they manufacture. By aligning ourselves with international supplier Moore & Wright, which has spent the past 106 years perfecting precision measuring instruments, we can share this expertise with the Southern African market.”
First Cut’s relationship with Moore & Wright, part of the UK-based Bowers Metrology Group, goes back many years and was cemented in 2002. “Moore & Wright was founded in 1906 by the innovative young engineer Frank Moore. With its roots fixed firmly in Sheffield, England, the company began by manufacturing a range of callipers, screwdrivers, punches and other engineer’s tools. Today, it supplies a vast range of precision measuring equipment to industries around the globe.
“The Moore & Wright product offering is a natural and synergistic fit with First Cut’s existing product basket,” says Gary Willis, Sales Director at First Cut. “Not only does this industry-benchmarked range of precision measuring equipment provide our engineering clients with absolute accuracy, but the products are also affordable.”
Moore & Wright’s extensive research and development has resulted in a range of precision equipment that meets every conceivable measuring requirement for industries where accuracy is paramount. By acknowledging and incorporating feedback from industry, the company’s highly experienced engineering team has been able to produce equipment that promises identical results with each subsequent measurement.

Moore & Wright’s extensive research and development has resulted in a range of precision equipment that meets every conceivable measuring requirement for industries where accuracy is paramount.
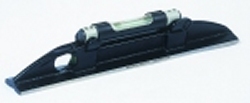
The Moore & Wright range includes verniers, micrometers, precision squares height gauges, indicators, magnetic indicator stands, protractors, outside micrometers, depth gauges, steel gauge blocks, carbide gauge blocks, ball gauges, V-blocks and levels and straight edges.
“A recent addition to the range is the combination set. This offering of one or more value-line products, together with a premium product, meets industry demand for cost-effective flexibility,” Willis explains.
“Recognising that precision is critical to our clients, First Cut takes comfort in offering the assurance that these top-quality instruments are provided with a calibration certificate. In addition, we are able to offer a full range of parts for each Moore & Wright instrument,” says Willis.
He continues: “Minimising downtime is critical to our clients, therefore instant availability of components provides our clients with the assurance of uninterrupted production.”
“First Cut is extremely pleased with the reputation that Moore & Wright products continue to enjoy in the market. The range proves that quality, premium brands can provide uncompromising results within the boundaries of affordability,” Poole concludes.
More News
{{ commodity.name }}
{{ post.title }}
{{ post.date }}


Comments